Sunday, January 10, 2021

Google Cloud Healthcare - Analytics

Summary

This post is a continuation of my previous on the Google Healthcare API.  In this post, I'll push the FHIR datastore into Google's data warehouse - BigQuery.  Once in BigQuery, the data can then be subjected to traditional analytics tools (SQL queries) and visualized with Google's report/dashboard tool - Data Studio.  For the purposes of these demos, I extended the Synthea-generated recordsets to 50 patient bundles.

Architecture

Below is a diagram of the cloud architecture.  FHIR data (JSON-based) is transformed into relational database tables on BigQuery.  SQL queries can then be created to analyze the data.  Finally, the output of those queries can be saved as Views and then presented in charts in Data Studio.


BigQuery Execution

FHIR Export

Below is the gcloud command-line to export an FHIR datastore to BigQuery.  This is a one-time export; however, it is possible to configure a continuous stream of updates from the FHIR store to BigQuery as well.

gcloud healthcare fhir-stores export bq $FHIR_STORE_ID \
  --dataset=$DATASET_ID \
  --location=$LOCATION \
  --bq-dataset=bq://$PROJECT_ID.$BIGQUERY_DATASET_ID \
  --schema-type=analytics

Query 1 - Top Ten Medications

At this point, a relational database is created within BigQuery and ready for analytics.  Below are a query and its output to find the top 10 prescribed meds within the FHIR datastore.


Query 2 - Demographics

Below is a query that provides a bucketing of the patient age groups.


Query 3 - Top Ten Conditions

Below is a query to derive the top 10 conditions within the patient population.


Views

I then created views for each of these queries.  Those views will be used for the presentation layer of the output in Data Studio.  Below is the view of the demographics query.


Data Studio Configuration

Now that the views are set up in BigQuery, it's now possible to create visualizations of them using Data Studio.  Below are the steps to do that.

Create a blank report


Select BigQuery as the data source


Select the BigQuery View


Configure the presentation


Choose the chart type


Output

Top Ten Medications


Demographics - Age Distribution


Top Ten Conditions


Source


Copyright ©1993-2024 Joey E Whelan, All rights reserved.

Friday, January 1, 2021

Google Cloud Healthcare - Clinic Simulation

Summary

In this post, I'll demonstrate the usage of the Google Cloud Healthcare API via a contrived scenario.  The simulation here is a clinic in Colorado that is taking on new patients.  Each patient brings with them a health history that is contained in electronic health records in an FHIR format.  These FHIR records are pushed into the Healthcare API and then available for search, analytics, etc.  I'll be using Synthea to generate artificial records. 

Scenario

Below is a depiction of the simulation at a logical level.


Architecture

Below is the overall Google Cloud architecture.  FHIR records are generated from Synthea and then uploaded to Cloud Storage.  Google Cloud Scheduler is used to simulate a stream of patients arriving at the clinic.  Cloud Scheduler triggers a Cloud Function via Pub/Sub.  That function pulls down a random number of FHIR patient transaction bundles and then executes them to load them into Cloud Healthcare.


Patient Record Generation

As mentioned previously, I'm using Synthea to generate FHIR records.  There are three (3) releases of the FHIR standard 'supported' by the Healthcare API.  Based on my experience here, Google is not supporting the latest release (R4) adequately.  There were enough issues with Synthea-generated R4 bundles with Google that I gave up on troubleshooting them and reverted to the previous FHIR rev - STU3.  Those work.

Below is the config I used for this simulation.  This yields STU3 FHIR resource bundles with all living patients.  The default Synthea config will generate a random number of deceased patients.  In the spirit of this simulation, it's not likely any deceased patients will be admitting themselves to the clinic.
generate.only_alive_patients = true

exporter.fhir.transaction_bundle = true
exporter.fhir.export = false
exporter.fhir_stu3.export = true
exporter.fhir_dstu2.export = false

exporter.hospital.fhir.export = false
exporter.hospital.fhir_stu3.export = true
exporter.hospital.fhir_dstu2.export = false

exporter.practitioner.fhir.export = false
exporter.practitioner.fhir_stu3.export = true
exporter.practitioner.fhir_dstu2.export = false
Below is the command line I used (Developer) and a snippet of the output.  I generated ten living patients in Colorado.

./run_synthea -p 10 Colorado -c ./config.txt

Population: 10
Seed: 1609530634098
Provider Seed:1609530634098
Reference Time: 1609530634098
Location: Colorado
Min Age: 0
Max Age: 140
5 -- Bradford382 Marks830 (1 y/o M) Security-Widefield, Colorado 
4 -- Laveta191 Becker968 (2 y/o F) Denver, Colorado 
2 -- Valene773 Shanahan202 (17 y/o F) Denver, Colorado 
6 -- Valrie435 Cruickshank494 (47 y/o F) Highlands Ranch, Colorado 
1 -- Chance908 Murray856 (56 y/o M) Pueblo, Colorado 
3 -- Lashawnda573 Hettinger594 (70 y/o F) Thornton, Colorado 
8 -- Shin962 Bahringer146 (69 y/o F) Denver, Colorado 
7 -- Johnie961 Padberg411 (68 y/o M) Thornton, Colorado 
10 -- Bridget51 Leffler128 (24 y/o F) Louisville, Colorado 
9 -- Carlos172 González124 (55 y/o M) Denver, Colorado 
Records: total=10, alive=10, dead=0

Google Cloud Configuration

Screenshots below of the various upfront configuration activities that were necessary for this simulation:

Cloud Storage


Cloud Healthcare


Cloud Pub/Sub


Cloud Scheduler


Cloud Function


Hospital and Practitioner Upload

Synthea generates three types of FHIR transaction bundles for a given synthetic load:  Patient, Hospital, and Practitioner.  Patient resources reference Hospital and Practitioner resources.  Practitioner resources reference Hospital resources.  Below are the CURL commands I used to upload the Hospital and Practitioner bundles.  Note that I'm using 'v1beta1' of the Healthcare API.  V1 doesn't handle conditional references properly.  The Synthea bundles have conditional references in them.

curl -X POST \
    -H "Content-Type: application/fhir+json; charset=utf-8" \
    -H "Authorization: Bearer $(gcloud auth application-default print-access-token)" \
    --data @hospitalInformation1609530634625.json \
    "https://healthcare.googleapis.com/v1beta1/projects/clinic-simulation/locations/us-central1/datasets/clinicset/fhirStores/clinicSTU3/fhir"


curl -X POST \
    -H "Content-Type: application/fhir+json; charset=utf-8" \
    -H "Authorization: Bearer $(gcloud auth application-default print-access-token)" \
    --data @practitionerInformation1609530634625.json \
    "https://healthcare.googleapis.com/v1beta1/projects/clinic-simulation/locations/us-central1/datasets/clinicset/fhirStores/clinicSTU3/fhir"

Code Snippets

Cloud Function for Executing Transaction Bundles


/**
 * Reads a FHIR bundle from GCS and then loads it to a Google Healthcare FHIR store
 * @param {File} file - GCS File object
 * @return {Promise} 
 * @throws {Error} propagates exceptions
 */
async function loadBundle(file) {   
    const auth = await google.auth.getClient({
        scopes: ['https://www.googleapis.com/auth/cloud-platform'],
    });
    google.options({
        auth, 
        headers: {
            'Content-Type': 'application/fhir+json'
        }
    });

    let bundle = '';
    return new Promise((resolve, reject) => {
        file.createReadStream()
        .on('data', (chunk) => {
            bundle += chunk;
        })
        .on('end', async () => {
            const request = { 
                parent: BASE_URL,
                type: 'Bundle',
                requestBody: JSON.parse(bundle),
            };
            let response;

            try {
                response = await healthcare.projects.locations.datasets.fhirStores.fhir.executeBundle(request);
                resolve(response.statusText);
            }
            catch(err) {
                reject(err);
            }
        })
        .on('error', (err) => {
            reject(err);
        });
    });
}

Search Function

Code below searches the FHIR store for male patients over age 60.

async function search() { 
    const auth = await google.auth.getClient({
        scopes: ['https://www.googleapis.com/auth/cloud-platform'],
    });
    google.options({
        auth, 
        params: {
            gender:'male',
            birthdate: 'lt1961-01-01'
        }
    });
  
    const request = { 
        parent: BASE_URL, 
        resourceType : 'Patient'
    };
    const response = await healthcare.projects.locations.datasets.fhirStores.fhir.search(request);
    
    return response.data.entry;
}

Execution

Log snippet below for the Generator function executing patient transaction bundles from Cloud Storage.


The abbreviated output below from the search function mentioned previously.  Recall there was only 1 male patient over 60 in the ten patients that were loaded.

     "name": [
        {
          "family": "Padberg411",
          "given": [
            "Johnie961"
          ],
          "prefix": [
            "Mr."
          ],
          "use": "official"
        }
      ],
      "resourceType": "Patient",


Result count: 1

Source


Copyright ©1993-2024 Joey E Whelan, All rights reserved.

Saturday, December 12, 2020

API Testing

Summary

I'll be discussing various methods for testing an API in this post.  This will include the usage of the AWS Distributed Load Testing tool.

Test Architecture

Below is the overall test architecture.  The left side represents various methods for System/QA type testing.  The right side represents a load testing option.


Web Services

Diagram below of the notional REST API system to be tested.  The scenario here is a service that tracks hit counts for web pages.


API Schema

Screen-shot of the OpenAPI schema created in Swagger's editor.


Server Snippet

A snippet of the 'create' service below.
//create
app.post('/page', (req, res) => {
    logger.debug('post request received');
    const pageId = req.body.pageId;
    if (pageId) {
        if (pageId in hitCounter) {
            res.status(400).json({error : 'page already exists'});
        }
        else {
            hitCounter[pageId] = 1;
            res.status(201).json({'pageId': pageId, 'hitCount': hitCounter[pageId]});
        }
    }
    else {
        res.status(400).json({error : 'missing pageId'});
    }
});


cURL Test Client

cURL 'create' command line and output below.
echo '***CREATE***'
curl -i -w "\n%{time_total} sec" -H "Content-Type: application/json" -d '{"pageId":"testpage"}' http://localhost:8888/page
echo '\n************\n'
***CREATE***
HTTP/1.1 201 Created
X-Powered-By: Express
Content-Type: application/json; charset=utf-8
Content-Length: 34
ETag: W/"22-2+hqei/ocIIynyLdm2zE/SJrQ/Q"
Date: Sun, 13 Dec 2020 00:45:57 GMT
Connection: keep-alive

{"pageId":"testpage","hitCount":1}
0.024595 sec
************


Custom Test Client

Custom nodejs client for the same 'create' endpoint.

async function createTest(url, body) {
    console.log(`Create Test: ${url}, ${JSON.stringify(body)}`);

    const start = Date.now();
    const response = await fetch(url, {
        method: 'POST',
        body: JSON.stringify(body),
        headers: {'Content-Type': 'application/json'}
    });
    const finish = Date.now();
    const respTime = finish - start;

    let result;
    try {
        result = JSON.stringify(await response.json());
    }
    catch (err) {
        result = err;
    }
    console.log(`Response status: ${response.status}`);
    console.log(`Response value: ${result}`);
    console.log(`Response time: ${respTime} ms`);
    console.log('****************');
}
Create Test: http://localhost:8888/page, {"pageId":"testpage"}
Response status: 201
Response value: {"pageId":"testpage","hitCount":1}
Response time: 39 ms
****************


Postman Test Client

This client can be automatically created by importing the OpenAPI 3.0 schema.


Load Testing

AWS has a pre-built architecture for generating load on REST clients here.  Screenshots of the build and execution of that tool.


Source


Copyright ©1993-2024 Joey E Whelan, All rights reserved.

Sunday, November 22, 2020

Google Document AI

Summary

This post is a continuation of the previous on Google Cloud Functions and intake of attachments in email.  In this post, I'll extend what was done previously with the Document AI and Natural Language (NL)APIs.  In particular, I'll be parsing a notional Return Merchandise Authorization (RMA) pdf with the Document AI to find a field that will determine what the appropriate human skill set is necessary for further processing.  Additionally, I'll use the Sentiment function within NL to determine if the RMA requires special processing - i.e., an unhappy customer that requires special handling.

Part 2:  Google Document AI

Architecture


Example Form Input

This is a screen-shot of the PDF that is used for the input for this example.

Code Snippet - GCF Storage Trigger

This code gets called when the PDF is uploaded to Cloud Storage by the email handling GCF discussed in the previous post.
exports.processRma = async (event, context, callback) => {
  try {
    await processForm(event); 
  }
  catch(err) {
    console.error(err);
  }
  finally {
    callback();
  }
};

Code Snippet - Main Function (processForm)

    const formFields = await parseForm(file);
    let disposition = {};
    let choice;
    let sentiment;

    for (const field of formFields) {
        const fieldName = field.fieldName.trim();
        switch(fieldName) {
            case 'Credit or Replace:':
                choice = field.fieldValue.trim().toLowerCase(); 
                console.log(`choice: ${choice}`);
                break;
            case 'Comments:':
                sentiment = await getSentiment(field.fieldValue.trim());
                console.log(`sentiment: ${sentiment}`);
                break;
            default:
                ;
                break;
        } 
    }
    if (sentiment < 0) {
        disposition.skill = 'ADVOCATE';
    }
    else if (choice === 'replace') {
        disposition.skill = 'REPLACE';
    }
    else {
        disposition.skill = 'CREDIT';
    }
    
    const folder = file.name.split('/')[0];
    disposition.signedUrl = await moveFile(gcsObj.bucket, folder, file);
    disposition.timestamp = await routeDisposition(disposition);
    await writeDisposition(folder, disposition);
    return disposition;

Results

Cloud Log

Note that Document AI parsed out that this was a credit request.  Also, note the negative sentiment calculated on the Comments field.


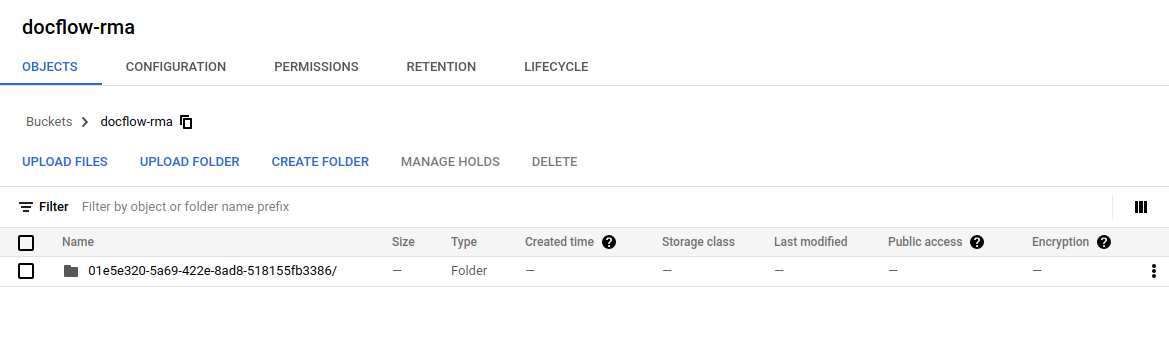
Cloud Storage End State


Disposition JSON File

Note the required skill was updated to 'ADVOCATE' from 'CREDIT' due to the negative comments.
{
"skill":"ADVOCATE",
"signedUrl":"https://storage.googleapis.com/rma-processed/501289c9-f39a-4b51-a60e-2246..",
"timestamp":"Mon, 23 Nov 2020 15:18:29 GMT"
}

Copyright ©1993-2024 Joey E Whelan, All rights reserved.

Saturday, November 14, 2020

Inbound Email Handling with Google Cloud Functions

Summary

This post covers the intake of emails w/attachments into Google Cloud Functions (GCF).  The code here covers storing those attachments into a Cloud bucket.

There is no native SMTP trigger for GCF, so a 3rd party needs to be used to convert the email to an HTTP POST that can subsequently trigger a GCF.  In this case, I used CloudMailin.  They have a nice interface and are developer-friendly.  The GCF then needs to process the multipart form data and write the file attachments to Cloud Storage.

Part 1:  Inbound Email Handling with Google Cloud Functions

Architecture


Code Snippet - GCF Trigger

exports.uploadRma = (req, res) => {
	if (req.method === 'POST') {
		if (req.query.key === process.env.API_KEY) {  
			upload(req)
			.then(() => {
				res.status(200).send('');

Code Snippet - Upload function

The Busboy module is leveraged to do the heavy lifting of parsing the multi-part form.  Each file is written to a UUID "folder" in Cloud Storage.  Those writes are stored in a Promise array that is resolved when all the attachments of the form have been parsed.

		const busboy = new Busboy({headers: req.headers});
		const writes = [];
		const folder = uuidv4() + '/'; 

		busboy.on('file', (fieldname, file, filename, encoding, mimetype) => {
			console.log(`File received: ${filename}`);
			writes.push(save(folder + filename, file));
		});

		busboy.on('finish', async () => {
			console.log('Form parsed');
			await Promise.all(writes);
			resolve();
		});

		busboy.end(req.rawBody);

Code Snippet - Save function

A read stream for the file attachment is piped to a write stream to Cloud Storage.
function save(name, file) {	
	return new Promise((resolve, reject) => {
		file.pipe(bucket.file(name).createWriteStream())
		.on('error', reject)
		.on('finish', resolve);
	});
}

Results

Original Email


Cloud Logs


Cloud Storage


Source


Copyright ©1993-2024 Joey E Whelan, All rights reserved.

Friday, November 6, 2020

Google Cloud Functions and CORS

 Summary

In this post, I'll dig into a common problem faced by developers:  Same-origin policy. A relaxation of that policy is known as Cross-origin Resource Sharing (CORS).  I'm going to focus on the challenges with CORS in the Google Cloud environment. 

Architecture

Below is the test environment I'll be using for the following four different scenarios:
  • Scenario 1:  Publicly-accessible (no authentication) Cloud Function call with no CORS support from a Cloud Storage hosted static website.
  • Scenario 2:  Public Cloud Function call with CORS support from the static website.
  • Scenario 3:  Private Cloud Function call (authentication required) with CORS support from the static website.
  • Scenario 4:  Proxied Cloud Function call to a private Cloud Function.  Proxy function is publically accessible and provides CORS support.

Scenario 1:  Public Function, No CORS Support

Cloud Function

exports.pubGcfNoCors = (req, res) => {
	res.set('Content-Type', 'application/json');
	let result;

	switch (req.method) {
		case 'POST':
			result = {
				result: 'POST processed'
			};
        	res.status(201).json(result);
			break;
		case 'GET' :
			result = {
				result: 'GET processed'
			};
        	res.status(200).json(result);
			break;
		case 'PUT' :
			result = {
				result: 'PUT processed'
			};
			res.status(200).json(result);
			break;
		case 'DELETE' :
			result = {
				result: 'DELETE processed'
			};
			res.status(200).json(result);
			break;
		default:
			res.status(405).send(`${req.method} not supported`);
	} 
};

CURL Output 

Success.  The function performs as expected from a CURL call.
$ curl https://us-west3-corstest-294418.cloudfunctions.net/pubGcfNoCors
{"result":"GET processed"}

Web Page (static HTML)

This static website is hosted on the domain corstest.sysint.club.  Line 16 below performs a fetch to a website outside of that domain (cloud function).  This sets up the same-origin conflict.
<!DOCTYPE html>
<html>

<head>
    <title>Google Cloud Function CORS Demo</title>
    <meta charset="UTF-8">
</head>

<body>

<h1>Public Google Cloud Function, No CORS Support</h1>

<input type="button" id="gcf" onclick="gcf()" value="Call GCF">
<script>
  async function gcf() {
    const url = 'https://us-west3-corstest-294418.cloudfunctions.net/pubGcfNoCors';
    const response = await fetch(url, {
      method: 'GET'
    });
    console.log('response status: ' + response.status);
    if (response.ok) {
      let json = await response.json();
      console.log('response: ' + JSON.stringify(json));
    }
  }
</script>
</body>

</html>

Browser Output

Fail.  Below is the expected results when the function is called:  same-origin conflict triggers the browser to prevent the fetch to the cloud function:

Scenario 2:  Public Function with CORS Support

Cloud Function

Line 3 provides the critical header necessary to allow the function call to be executed in a browser environment.
exports.pubGcfCors = (req, res) => {
	res.set('Content-Type', 'application/json');
	res.set('Access-Control-Allow-Origin', 'http://corstest.sysint.club');
	let result;

	switch (req.method) {
		case 'POST':
			result = {
				result: 'POST processed'
			};
        	res.status(201).json(result);
			break;
		case 'GET' :
			result = {
				result: 'GET processed'
			};
        	res.status(200).json(result);
			break;
		case 'PUT' :
			result = {
				result: 'PUT processed'
			};
			res.status(200).json(result);
			break;
		case 'DELETE' :
			result = {
				result: 'DELETE processed'
			};
			res.status(200).json(result);
			break;
		default:
			res.status(405).send(`${req.method} not supported`);
	} 
};


Browser Output

Success.  The function call succeeds here; however, the function is open to be called by anyone.  Its permissions has allUsers listed as a Function Invoker.


Scenario 3:  Private (authenticated) Function with CORS Support

Cloud Function

Below I've added both the allowed origin header and support for CORS preflighting (OPTIONS).
exports.privGcfCors = (req, res) => {
	res.set('Content-Type', 'application/json');
	res.set('Access-Control-Allow-Origin', 'http://corstest.sysint.club');
	
	let result;

	switch (req.method) {
		case 'OPTIONS' :
			res.set('Access-Control-Allow-Methods', 'POST, GET, PUT, DELETE');
			res.set('Access-Control-Allow-Headers', 'Authorization');
			res.set('Access-Control-Max-Age', '3600');
			res.status(204).send('');
			break;
		case 'POST':
			result = {
				result: 'POST processed'
			};
        	res.status(201).json(result);
			break;
		case 'GET' :
			result = {
				result: 'GET processed'
			};
        	res.status(200).json(result);
			break;
		case 'PUT' :
			result = {
				result: 'PUT processed'
			};
			res.status(200).json(result);
			break;
		case 'DELETE' :
			result = {
				result: 'DELETE processed'
			};
			res.status(200).json(result);
			break;
		default:
			res.status(405).send(`${req.method} not supported`);
	} 
};

CURL Output

Success.  Excerpt of a CURL call to this function with a Google Authentication token.  Works as expected.
curl -v https://us-west3-corstest-294418.cloudfunctions.net/privGcfCors \
-H "Authorization: Bearer eyJhbGciOiJSUzI1NiIsImtpZCI6ImYwOTJiNjEyZTliNjQ0N2RlYjEwNjg1YmI4ZmZhOGFlNjJmNmFhOTEiLC"


< HTTP/2 200 
< access-control-allow-origin: http://corstest.sysint.club
< content-type: application/json; charset=utf-8
< etag: W/"1a-fWnKK8jLd+Ggo6nxcFzkss7mXew"
< function-execution-id: fe2h4j6lnolk
< x-powered-by: Express
< x-cloud-trace-context: 476e70bffcca5a4ee942d27752f18f4c;o=1
< date: Fri, 06 Nov 2020 20:15:30 GMT
< server: Google Frontend
< content-length: 26
< alt-svc: h3-Q050=":443"; ma=2592000,h3-29=":443"; ma=2592000,h3-T051=":443"; 
{"result":"GET processed"}

Web Page

Support added to the web page for Google authentication.  A Google JWT token is fetched and then sent via an Authorization header to the private cloud function.
<!DOCTYPE html>
<html>

<head>
    <title>Google Cloud Function CORS Demo</title>
    <meta charset="UTF-8">
    <meta name="google-signin-scope" content="profile">
    <meta name="google-signin-client_id" content="54361920328-624lh96v98erlacmp5u92ds5nhjg1kqq.apps.googleusercontent.com">
    <script src="https://apis.google.com/js/platform.js" async defer></script> 
</head>

<body>

<h1>Private Google Cloud Function with CORS Support</h1>

<div class="g-signin2" data-onsuccess="signIn" data-theme="dark"></div>
<input type="button" id="gcf" onclick="gcf()" value="Call GCF" style="display: none;">
<script>
  let id_token;

  function signIn(googleUser) {
    const profile = googleUser.getBasicProfile();
    const name = profile.getName();
    id_token = googleUser.getAuthResponse().id_token;
    console.log("User: " + name); 
    console.log("ID Token: " + id_token);
    document.getElementById("gcf").style.display = "block"; 
  }

  async function gcf() {
    const url = 'https://us-west3-corstest-294418.cloudfunctions.net/privGcfCors';
    const response = await fetch(url, {
      method: 'GET',
      headers: {
        'Authorization': 'Bearer ' + id_token
      }  
    });
    console.log('response status: ' + response.status);
    if (response.ok) {
      let json = await response.json();
      console.log('response: ' + JSON.stringify(json));
    }
  }
</script>
</body>

</html>

Browser Output

Fail.  This is where things get interesting.  Even though CORS and authentication are handled in the cloud function and web page, execution of the cloud function still fails.  Network view below.  The reason behind the failure is apparent:  the CORS preflight (OPTIONS) request fails.  I consider this a bug with Cloud Functions and integration of Functions with Cloud Endpoints via Cloud Run.  Google is calling this a feature request vs bug.  In any case, neither platform handles CORS preflighting properly in an authenticated environment.  Both are looking for an authentication header with that OPTIONS call.  That doesn't happen with any browser - which is per the spec.


Scenario 4:  Proxied calls to the Private Cloud Function

One workaround for this to put everything into one domain.  That eliminates the CORS preflight trigger.  Another option is a custom proxy for the private Cloud Function.  Remember, the productized solution (Cloud Endpoints) is not a solution at the time of this writing.  It suffers from the same CORS preflight problem with authentication.

Architecture


Proxy in a Cloud Function

This is a publicly-accessible Cloud Function that leverages the http-proxy module to relay requests/responses to a target URL passed a query param.  That target URL represents the private Cloud Function.  That private function now no longer needs any CORS handling code.  All CORS interactions happen with the Proxy function.
const httpProxy = require ('http-proxy');

exports.gcfProxy = (req, res) => {
    res.set('Access-Control-Allow-Origin', 'http://corstest.sysint.club');
	const proxy = httpProxy.createProxyServer({});

    switch (req.method) {
		case 'OPTIONS' :
			res.set('Access-Control-Allow-Methods', 'POST, GET, PUT, DELETE');
			res.set('Access-Control-Allow-Headers', 'Authorization');
			res.set('Access-Control-Max-Age', '3600');
			res.status(204).send('');
			break;
		case 'POST':
		case 'GET':
		case 'PUT':
		case 'DELETE':
			proxy.web(req, res, { target : req.query.target });
			break;
		default:
			res.status(405).send(`${req.method} not supported`);
	} 
};

CURL Output

Success.
curl -v https://us-west3-corstest-294418.cloudfunctions.net/gcfProxy?target=\
https://us-west3-corstest-294418.cloudfunctions.net/privGcfNoCors \
-H "Authorization: Bearer eyJhbGciOiJSUzI1NiIsImtpZCI6ImYwOTJiNjEyZTliNjQ0N2RlYjEwNjg1YmI4ZmZhOGFlNjJmNmFhOTEi"

< HTTP/2 200 
< access-control-allow-origin: http://corstest.sysint.club
< alt-svc: h3-Q050=":443"; ma=2592000,h3-29=":443"; ma=2592000,h3-T051=":443"; 
< function-execution-id: x4lxp9wh8gm5
< x-cloud-trace-context: 3cf2d592ced9b73ba25e6b361d6197c4;o=1
< x-powered-by: Express
< date: Fri, 06 Nov 2020 21:05:07 GMT
< server: Google Frontend
< content-length: 26
< 
* Connection #0 to host us-west3-corstest-294418.cloudfunctions.net left intact
{"result":"GET processed"}

Browser Output

Success.


Copyright ©1993-2024 Joey E Whelan, All rights reserved.

Monday, September 7, 2020

Azure Web Services Transformation


Summary

In this post I'll demonstrate an interim transformation of a premise-based web service to cloud-based services.  I'll be utilizing the MS Azure services stack for this transformation.

Premise Service Example

I'll use the key-value pair store implementation discussed in my previous post as the premise service to be transformed.  As a recap, this was a simple Nodejs/Express REST service defining Create (POST), Retrieve (GET), Update (PUT), and Delete (DELETE) service calls for key-value pairs stored in memory on the server.  Additionally, this service group used mutual TLS/client certificates for authentication to all the REST services.  Diagram below of the service.


FaaS Proxy

The first step in transforming this API to a cloud-based service will be creating proxy functions for each of the REST calls via Azure Functions.  Azure has a strong integration with VS Code via the Azure Functions Extension.  Below is a VS Code screen-shot of the resulting local REST API set developed for Azure Functions.  Note the 'authLevel' has been set to 'function'.  That means an Azure function-level API key must be provided to execute this function.


Code snippet below of the Azure CREATE function (REST POST).
'use strict';
'use esversion 6';
const https = require('https');
const fs = require('fs');
const fetch = require('node-fetch');
const key = fs.readFileSync("clientKey.pem");
const cert = fs.readFileSync("clientCert.pem");
const options = {
    key: key,
    cert: cert,
    rejectUnauthorized: false
};
const tlsAgent = new https.Agent(options);
const url = 'https://premiseServer:8443/kvp/';

module.exports = async function (context) { 
    try {
        const response = await fetch(url, {
            method: 'POST',
            body: JSON.stringify(context.req.body),
            headers: {'Content-Type': 'application/json'},
            agent: tlsAgent
        });

        context.res = {
            headers: {'Content-Type': 'application/json'},
            status: response.status, 
            body: await response.json()
        };
    }
    catch (err) {
        context.res = {
            headers: {'Content-Type': 'application/json'},
            status: 400, 
            body: {'error': err}
        };
    }
}


Deployment to the cloud can be accomplished via the VS Code extension as well.  Screen-shot below of the resulting push of this code/config to Azure.


Finally, diagram below of the full FaaS proxy model implemented with Azure Functions.  Function calls require the Azure Function key per function at this point.


API Gateway

Next step in the transformation is to place these Azure Functions behind an API Gateway.  The Azure implementation of that is the Azure API Management (APIM) service.  APIM adds important functionality such as authentication management, monitoring, throttling, etc.  Screen-shot below of the resulting mapping of each of the Azure functions to an APIM endpoint.  By default, APIM function access will require a 'subscription key'.  Additionally, APIM will auto-provision 'host key' authentication for access to the Azure functions that have 'function' auth level defined. 


Resulting architecture below:


Final Thoughts

Further Azure service integrations can be provisioned at this point.  Examples:  APIM will integrate directly with OAuth 2.0 authentications schemes, the APIM REST surface can be placed behind Azure Cloud CDN or Front Door services to add further functionality and resilience to the services.
Copyright ©1993-2024 Joey E Whelan, All rights reserved.